TL;DR (Too Long; Didn’t Read)
The diopter adjustment fine-tunes one side of your binoculars to match the difference between your eyes. To set it:
- Cover the right barrel and focus using the centre wheel.
- Cover the left barrel and adjust the diopter ring until the image is sharp.
- Your binoculars are now matched to your vision — no more constant refocusing.
Why the Diopter Matters
No two eyes are exactly alike. Even a tiny difference in vision between your left and right eye can make one side of your binoculars look sharper than the other. That’s where the diopter adjustment comes in — it lets you focus each side independently so that both eyes see a crystal-clear image. If your diopter isn’t set correctly, you might notice:
- Eye strain or fatigue
- A feeling like you’re “fighting” to merge the two images
- Constant need to refocus
Once you set it properly, you can focus on your subject with a single turn of the centre wheel.
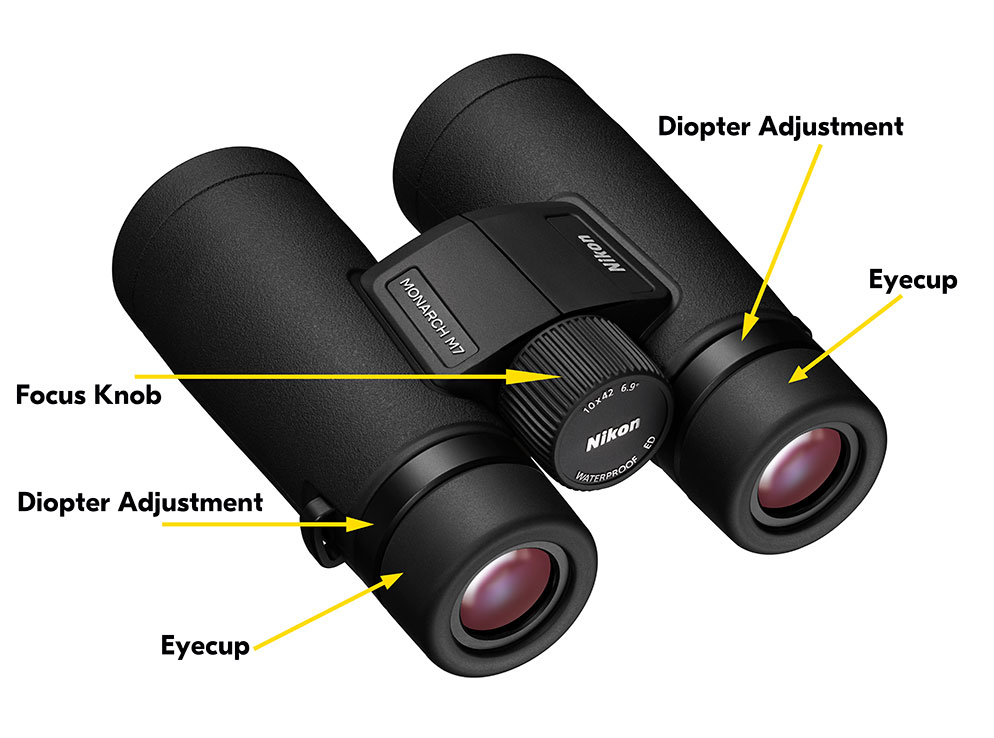
Where to Find the Diopter
On most binoculars, the diopter adjustment is:
- A rotating ring located on or just below the right eyepiece
- Marked with a “+” and “–” scale
- Sometimes lockable to prevent accidental changes (For a full breakdown of binocular parts, check out Binoculars 101).
Step-by-Step: Setting Your Diopter
Tip: Do this in bright daylight for the clearest results.
- Find a stationary target: Pick something with fine detail — like a street sign, tree branch, or power pole — about 50–100 metres away.
- Cover the right barrel: Use the lens cap or your hand. Look through the left barrel with your left eye.
- Focus with the centre wheel: Turn the main focus wheel until the image in your left eye is sharp and crisp.
- Cover the left barrel: Switch the cover (or your hand) to the left barrel so you’re looking through the right barrel with your right eye.
- Adjust the diopter ring: Rotate the diopter until the image in your right eye is perfectly sharp. Do not use the centre wheel at this stage.
- Test both eyes together: Remove the covers and look with both eyes. The image should snap into focus with the centre wheel only.
Tips for Success
- Mark your setting: Some people put a tiny piece of tape or note the position in case the ring gets moved.
- Lock it if possible: Some binoculars have a locking diopter to prevent accidental bumps.
- Recheck over time: Changes in your eyesight or temperature-related expansion in the binoculars can sometimes require small tweaks.
Final Thoughts
Setting your diopter only takes a minute, but it makes a world of difference. Once it’s dialed in, your binoculars will feel more natural, comfortable, and ready for action — whether you’re birding, hunting, or just enjoying the view.